AI Food Photo Editor: Transform Restaurant Photos in Minutes
Restaurant photos can make or break your delivery orders. Learn how an AI food photo editor transforms smartphone shots into menu-ready images in minutes - without expensive photoshoots or design skills.
In This Article
- The Visual Problem Every Restaurant Faces
- What Makes AI Food Photo Editors Different
- Step-by-Step: Using AI to Enhance Your Food Photos
- Why We Built GourmetPix This Way
- FAQ
The Visual Problem Every Restaurant Faces
You've got regulars who love your food. Word of mouth is solid. But on delivery apps - Talabat, Deliveroo, Uber Eats, Swiggy, whichever dominates your market - new customers scroll past your listing without a second look.
The food isn't the problem. The photos are.
Platform data backs this up: restaurants with better photos see 30-70% more orders.[1] Deliveroo found that menus with more images capture the majority of online orders. Other platforms report similar numbers - 30% or higher increases when restaurants upgrade their photos.[2]
The global food delivery market sits above $288 billion. Everyone's competing for screen space. And when deciding what to order, customers rely on photos 1.44 times more than menu descriptions.[2]
Until recently, you had two options. Pay a photographer $50 to $500 per hour, block out half a day, wait for editing, and hope your menu doesn't change next month. Or use your phone and accept what you get.
AI food photo editors offer a third option.
What Makes AI Food Photo Editors Different
Regular photo editing software adjusts what's already in your shot: brightness, contrast, saturation, cropping. You can brighten a dark photo or boost dull colours. Useful to a degree, but that's about it.
The cluttered background stays. The harsh overhead lighting that makes your dining room look like a hospital cafeteria remains visible. Half your kitchen in frame behind the plate isn't going anywhere.
A food photo enhancer using AI scene transformation works differently. It keeps your actual food intact while generating an entirely new setting around it.
Put simply: traditional editing tweaks what you captured. AI transformation solves the real problem: your kitchen, your prep station, your dining room doesn't look like a professional photo studio. And there's no reason it should.
 Your smartphone captures the food. AI creates the professional setting around it.
The AI market in food and beverages is growing at 37% annually, projected to hit $263 billion by 2034.[3] Food photo enhancers like GourmetPix are a big part of that.
Step-by-Step: Using AI to Enhance Your Food Photos
Once you've done it a few times, the whole process takes about five minutes per dish.
Step 1: Capture Your Source Photo
The AI can only work with what you give it. No professional equipment required, but a few basics matter.
Lighting. Shoot in the brightest spot you can find. A window with indirect daylight is ideal. Natural light makes a massive difference. Stay away from your phone's flash. It flattens everything and creates harsh shadows that are hard to fix.
Focus. Tap the screen to lock focus on the food, then hold steady. Blurry photos create blurry outcomes. Avoid portrait mode - the artificial bokeh that blurs parts of your dish stays in the final image and rarely looks good. Use your phone's standard photo mode to keep the whole plate sharp.
Presentation. Plate it like you're about to serve it to a customer. Wipe any drips off the rim. Fresh garnish if that's part of the dish. Whatever's in the photo is what the AI preserves.
Angle. For most dishes, shoot from about 45 degrees - roughly how a customer would see it at the table. Overhead works for flat items like pizzas, salads, or rice bowls. Straight-on is better for taller items like burgers, parfaits, or layer cakes. Lower angles also work well for outdoor styles where you want more background visible.
Step 2: Upload and Choose a Style
Upload your image to GourmetPix. You'll see several style presets designed for different restaurant types:
- Studio/Clean - neutral backgrounds with nothing to distract. Works well for delivery app listings where you need the food front and centre.
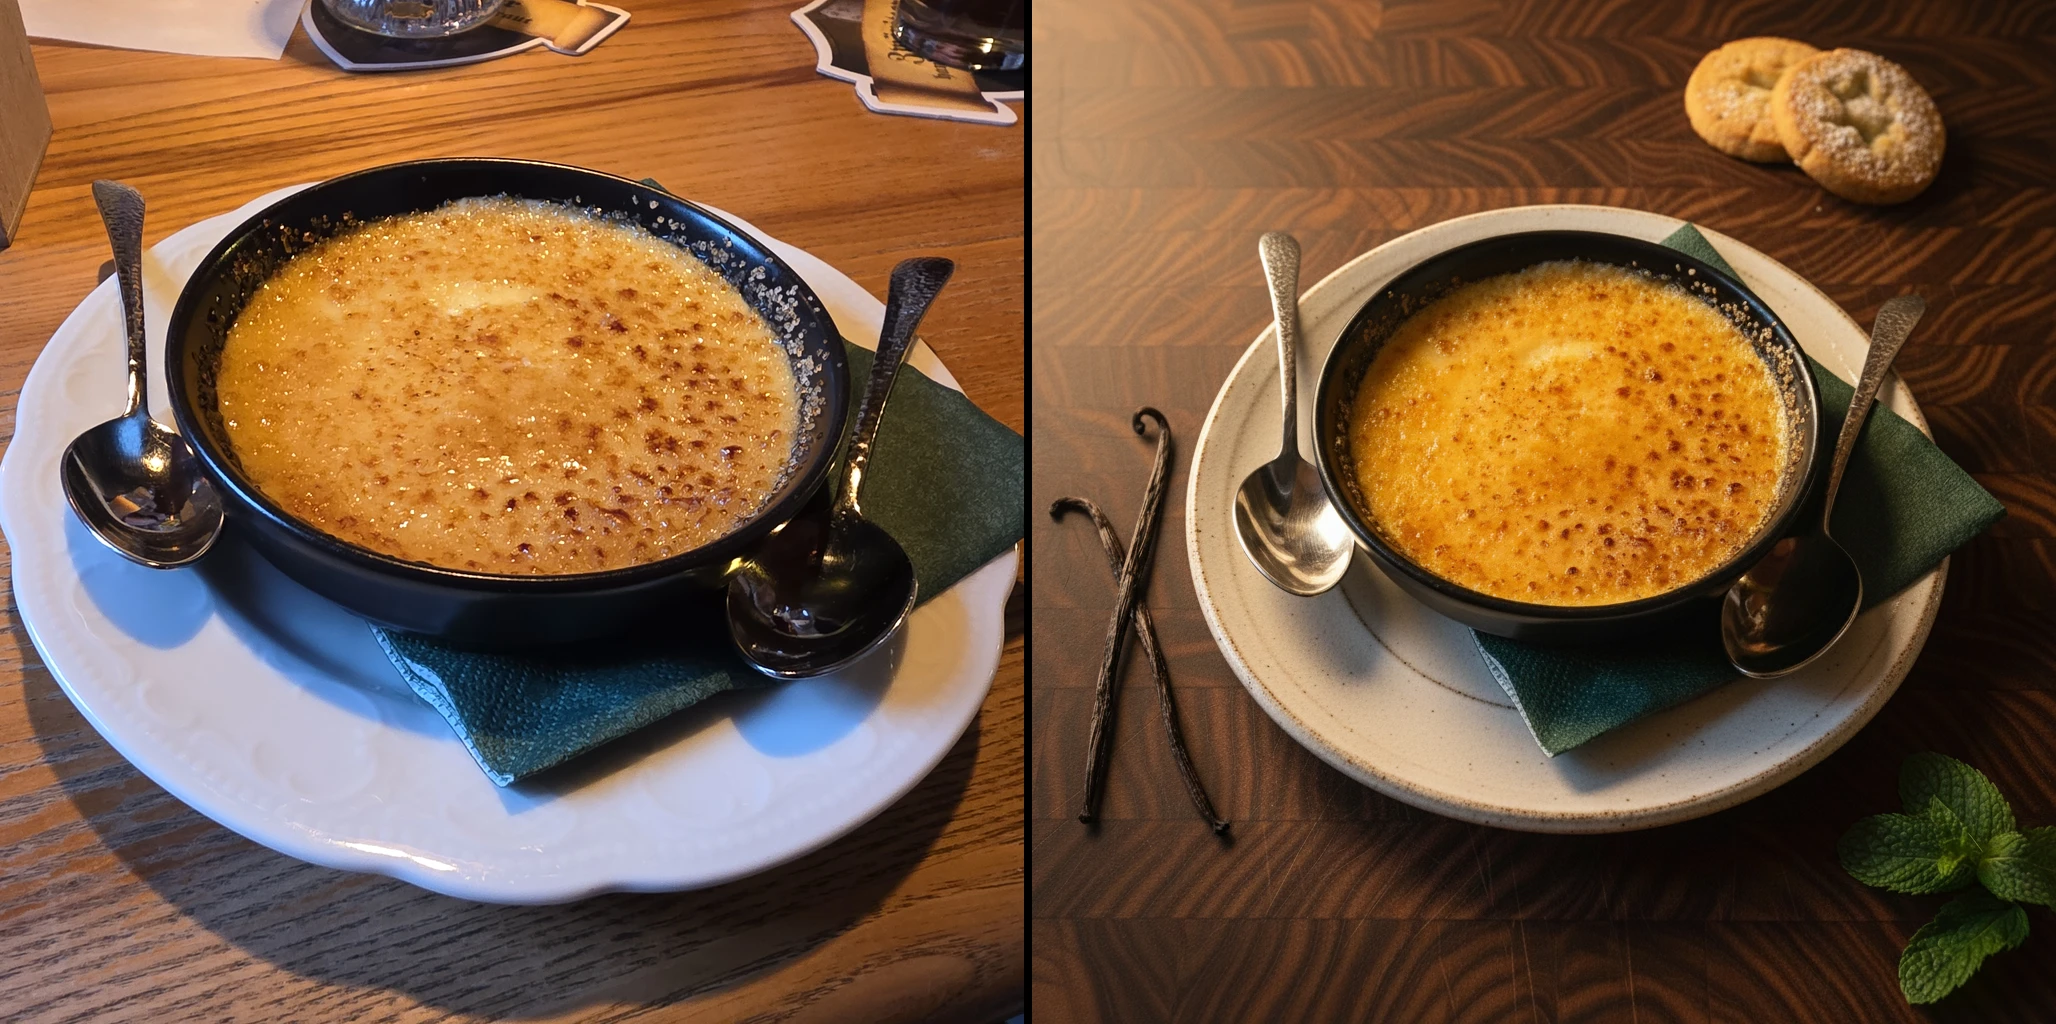
- Rustic/Cozy - wooden surfaces, linen textures, that farmhouse feeling. Bakeries, brunch cafes, anything comfort food.
- Elegant - darker tones, subtle metallic accents, refined surfaces. Fine dining, tasting menus, special occasion spots.
- Outdoor/Fresh - greenery, natural daylight, outdoor terrace atmosphere. Health-focused menus, summer specials, salad bars.
- Urban/Industrial - concrete, steel, raw materials. Works for modern bistros, street food concepts, fusion restaurants.
- Custom - upload your own reference image to match your restaurant's interior or brand aesthetic.
Each preset generates a completely different environment around your dish while keeping the food itself exactly as you photographed it.
Step 3: Review the Initial Result
Results usually appear within 30-60 seconds. The AI analyzes your food, identifies the edges, and places everything into the new scene.
A few things to check:
Authenticity. The dish should still look like your dish. Colours accurate, textures preserved: the char on grilled meat, the gloss on a sauce, the crumb on bread.
Style fit. A casual neighbourhood trattoria probably shouldn't have stark, clinical backgrounds. A high-end omakase counter looks odd on rustic farmhouse wood. Match the setting to your restaurant's personality.
Edge quality. GourmetPix handles the transition between food and background cleanly, but intricate shapes like herb garnishes or drizzled sauces can sometimes need a second look. Refine if needed.
Step 4: Refine with Text Prompts
GourmetPix lets you tweak results by typing what you want. This is where it gets genuinely useful.
Refinement works best for adding or removing elements. Some examples:
- "Add a fork on the left side"
- "Remove the napkin"
- "Put a blurred second plate in the background"
- "Switch to a marble surface instead of wood"
The AI reads your request and adjusts the scene.
GourmetPix lets you refine until you're happy with the result. The difference between "acceptable" and "this looks exactly right" often comes down to one or two small adjustments.
Step 5: Upscale and Export
When you're satisfied with the result, use the upscale option to increase the image resolution to 4K (around 4000 pixels on the long edge). Higher resolution gives you more flexibility. The same image works for delivery apps, your website, social media, and print without looking soft or pixelated.
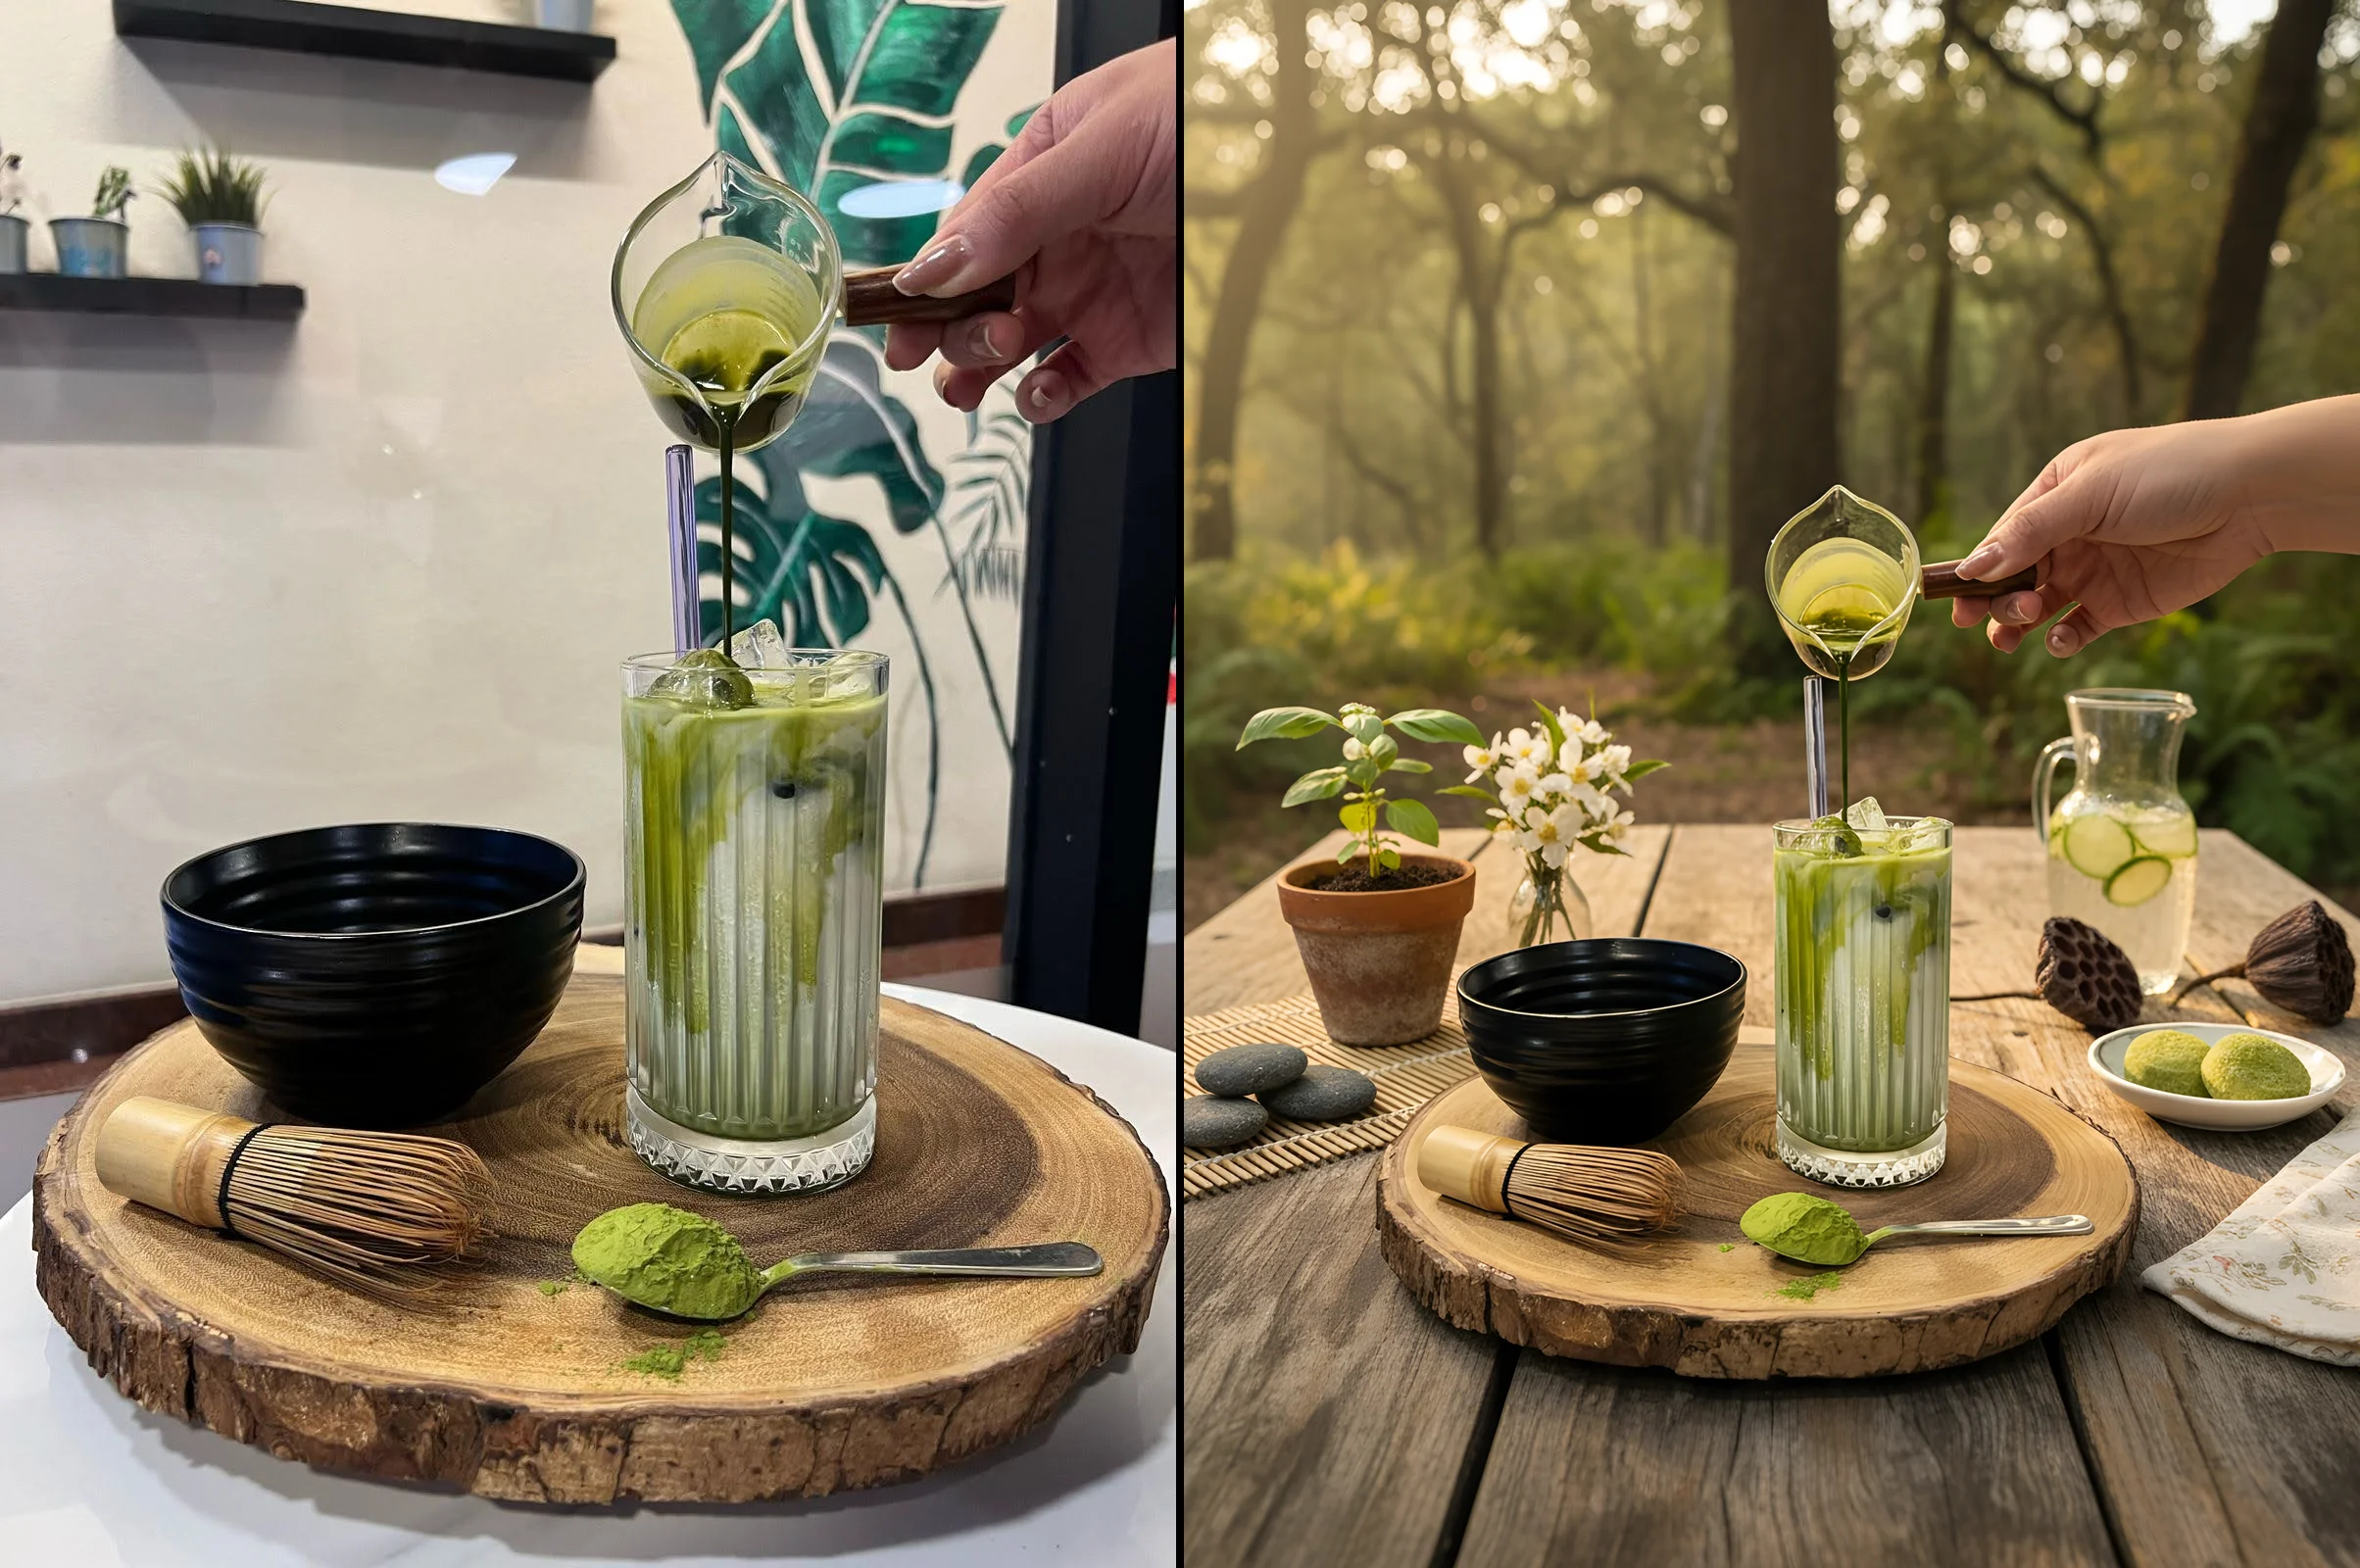 Same drink, transformed for social media with an outdoor aesthetic.
Why We Built GourmetPix This Way
Generic AI image tools don't work well for food. We learned this the hard way and built GourmetPix to solve the specific problems restaurants face.
Built for Food, Not Everything
Generic AI editors treat your pasta the same way they'd treat a product shot of headphones. Food needs to look appetizing, not just technically sharp. Generic tools tend to oversaturate, smooth out textures that should be visible, or generate backgrounds that look obviously artificial.
GourmetPix is designed specifically for food photography, preserving the textures, colours, and details that make food look appetizing rather than artificial.
Preservation Over Generation
Most AI tools want to "improve" your food. The goal is your burger, not a prettier burger the AI invented. Some tools lean heavily towards generation, essentially creating a new image loosely based on what you uploaded. Results can look impressive for a second, then your brain registers something's off. There's a point where food looks too perfect and becomes unappetizing.
GourmetPix keeps your food faithful to reality and only generates the scene around it. We optimized for "this looks like real restaurant food" - not "this looks like AI made it." When the plate arrives at the table, it should match what they saw online.
Iterate Until It's Right
AI results can vary from time to time - you might love the first output, or you might want to explore alternatives. GourmetPix lets you do both: generate again for a different take, or refine with text prompts to tweak specific elements. Keep iterating until it matches your vision.
We're never fully satisfied with "good enough." Your feedback helps us get to results that actually satisfy you - not just us.
High Resolution Export
Some AI tools only output small images that work for social media but fall short for printed menus or posters. GourmetPix includes an upscaling feature that brings your images up to 4K, so you can use the same image across delivery apps, your website, menu boards, and print.
Full Commercial Rights
You own what you create. Use your images anywhere for your business: menus, marketing, social media, print, delivery platforms. No attribution required. For full details on usage rights, see our terms.
Ready to transform your menu photos? See our pricing or try GourmetPix free - 10 credits included, no credit card required.
Frequently Asked Questions
What exactly is an AI food photo editor?
Software that uses machine learning to transform food photographs. Regular editors adjust brightness and colour. AI food photo editors go further. They can replace backgrounds entirely, generate realistic studio settings, and create professional-looking environments around your dish. The better ones are designed specifically for food, preserving textures and colours that look appetizing rather than artificial.
How does a food photo enhancer actually work?
It analyzes your uploaded image, identifies where the food is, and generates a new environment around it. That includes the surface the plate sits on, the background, the lighting mood, sometimes props in the scene. Your actual food stays exactly as you photographed it. Only the setting changes.
Will AI make my phone photos look professional?
With decent lighting and sharp focus, yes. AI scene transformation handles the environment: the amateur-looking background, the cluttered kitchen, the harsh lighting that makes everything look flat. Proper lighting technique remains important.
How long does this actually take?
First results appear in 30-60 seconds. Refinements take about the same. Realistically, the whole process takes roughly 5 minutes per image from upload to final download. Traditional photography involves scheduling, preparing the kitchen, the actual shoot, then waiting days for editing. The time difference is substantial.
Can I use AI-enhanced photos for printed menus?
Yes, provided you export at sufficient resolution. 4K or higher gives you enough pixels for printed menus, posters, even larger format boards.
Should I use AI or just hire a photographer?
It depends on the use case. For major campaigns or flagship dishes requiring very specific creative direction, a professional photographer may be worthwhile. For everything else, like keeping your entire menu looking consistent, updating seasonal specials, or working within a budget, AI is the practical choice. Many restaurants use both: professional shoots for hero marketing shots, AI enhancement for day-to-day menu updates.
References
Ready to Transform Your Food Photos?
Join thousands of restaurants and food businesses using AI to create stunning, professional images.
GET STARTED